How to process a Data Subject Access Request (DSAR)
Submission of Request
All DSA requests are submitted through the form on the website privacy portal or the IVR (toll-free number).
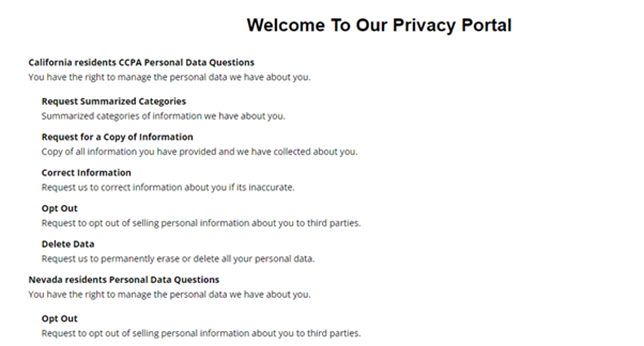
Under CCPA, California residents can make the following requests: Summarized Categories of Information, Copy of Information, Opt-Out, and Delete Data
Nevada residents can make Opt-Out requests
Data Governance Tool users are generally assigned Action Items by their respective Admins when a DSA request is received. This guide demonstrates all the steps involved in processing a DSA request from the user's standpoint.
- Once the requestor submits a request, the request will flow to the Data Governance Tool under the DSAR option.
- At the same time, an email will be sent to the requestor to verify the primary email address provided in the request submission form
Note: The request is saved in a temporary location until the web job runs. The syncDSR web job runs every 5 mins, which brings the request from the temporary location to the DSAR main table.
- Once the request is moved to the processing queue, the DSAR configuration created by your admin will start running. As per the instructions, the request will be sent to the respective users for processing as action items. The admin can also create action items manually, if required.
Request Processing is categorized into:
- Validate Request
- Process Request
- Build Report (only required for a specific type of request)
- Deliver
There are only two categories wherein the user is involved. They are- Validate Request and Process Request
Validate Request
Validation of Request is a step in processing the DSA request that involves matching the requestor's details against the customer master database to consider it a valid request. The request can be processed if the requestor details are found in the database; otherwise, additional information is needed.
- Once the request is in the In Validation state, the specified user to whom the task has been assigned will receive an email directing them to the Action Item
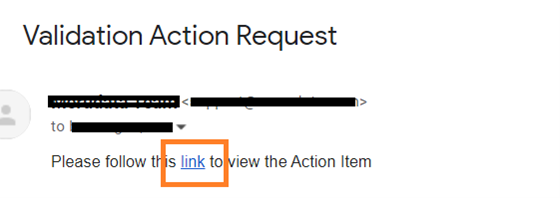
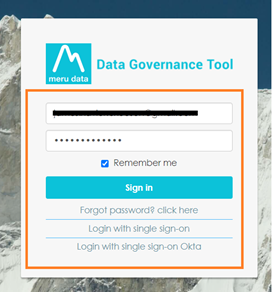
Click on the hyperlink, and it will directly take you to the Data Governance Tool login page

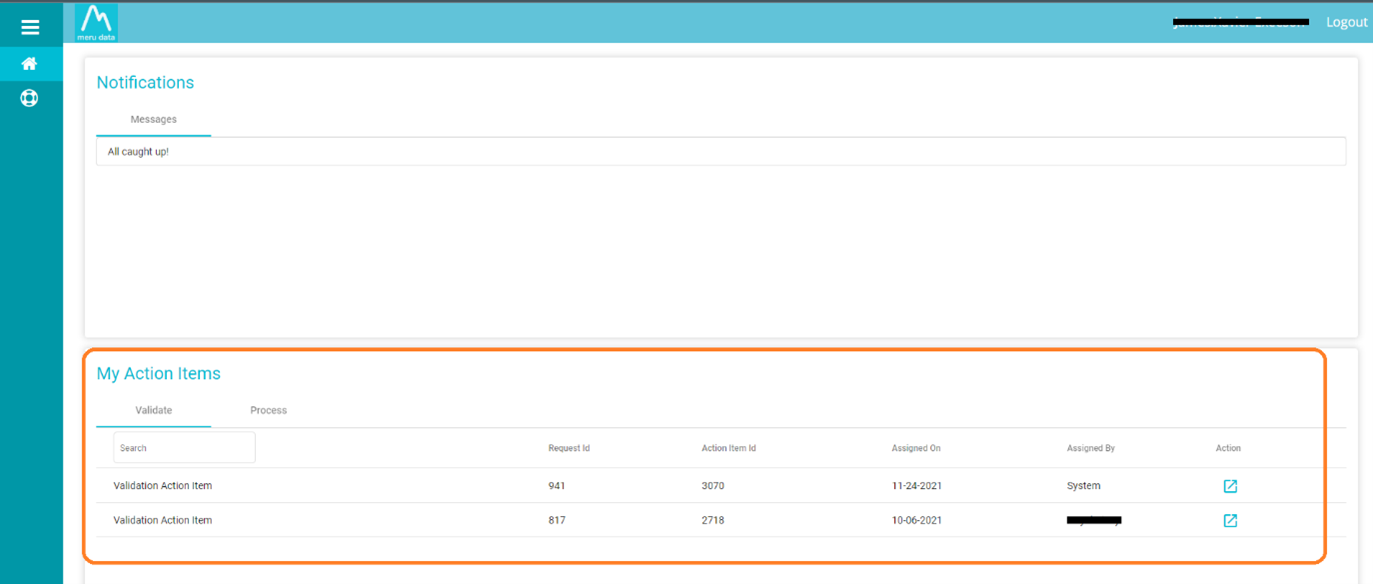
Once logged in, you will see the Action Items assigned to you.
Alternatively, you can also access all Action Items assigned to you under My Action Items section located at the bottom of your Home Page.
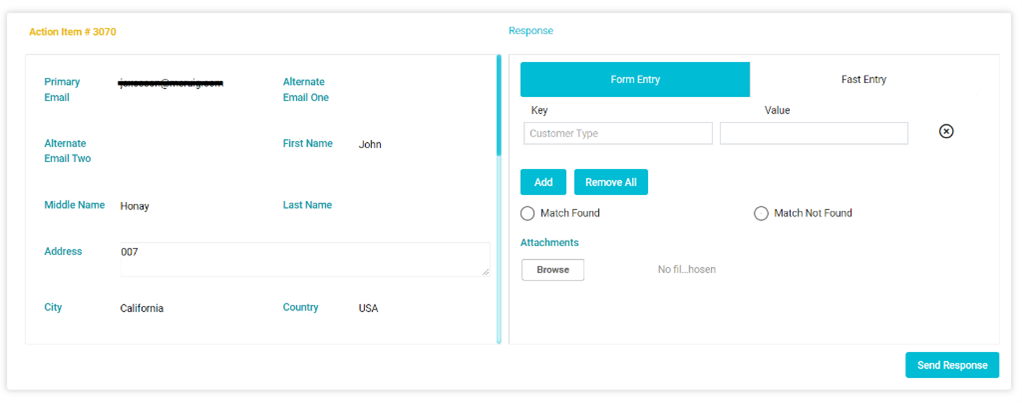
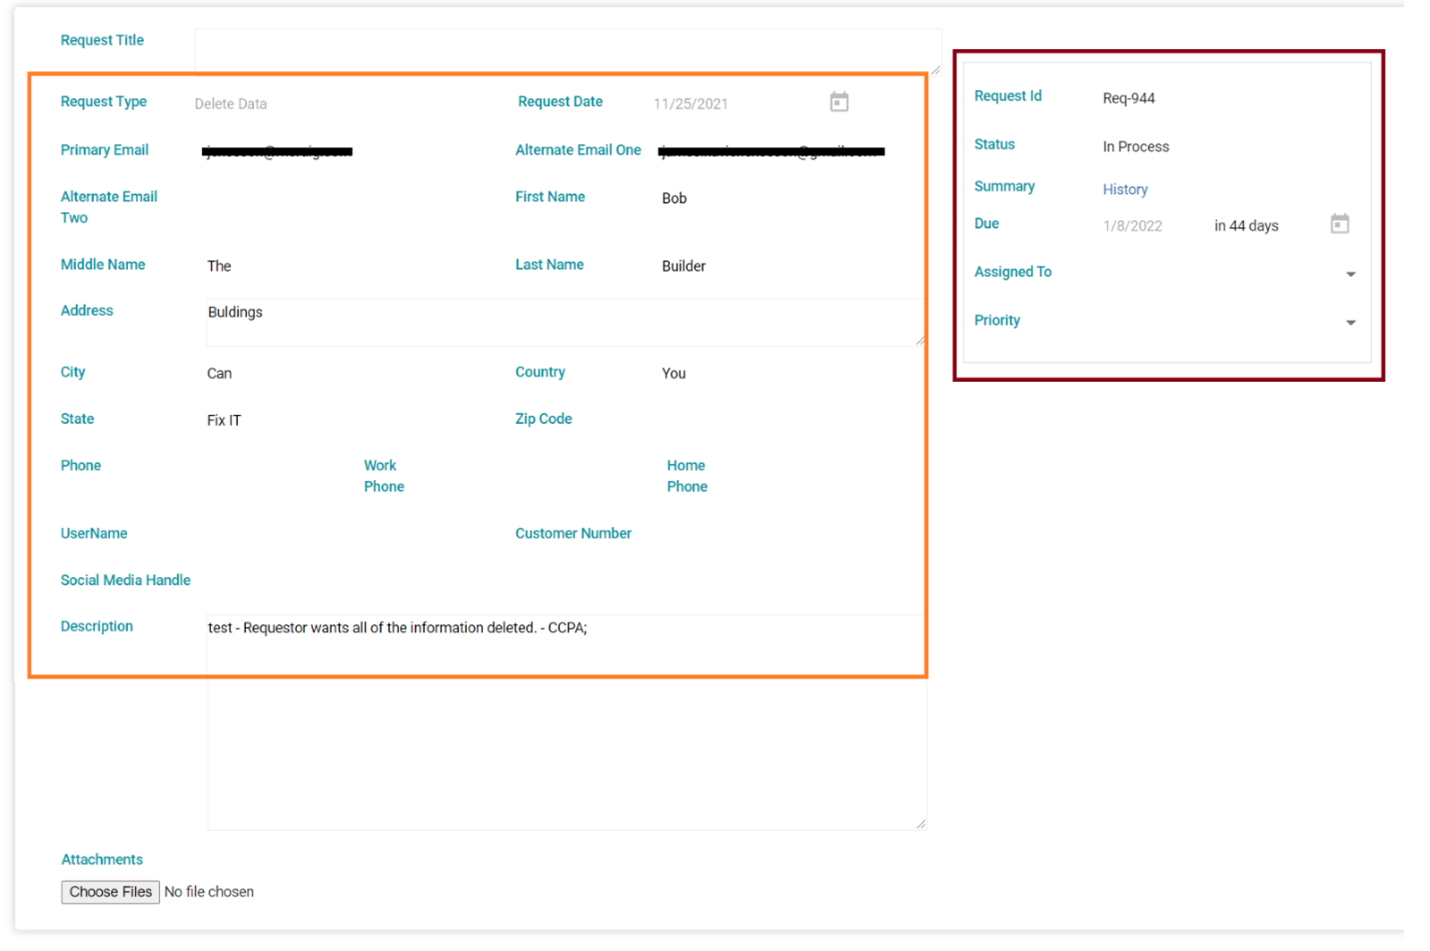
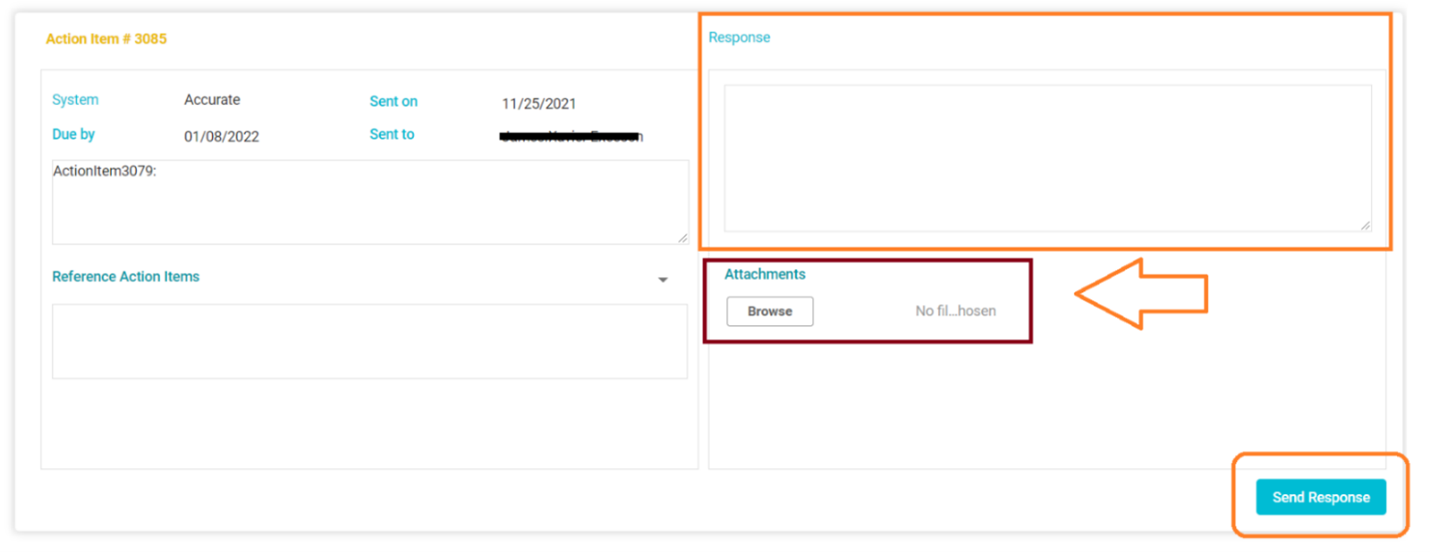
The Request Validation page shows the requestor's details along with the description of the request, date of request, due date, and to whom the request was sent.
Your Response to the Action Item is to be added under the Response pane on the right side of the page.
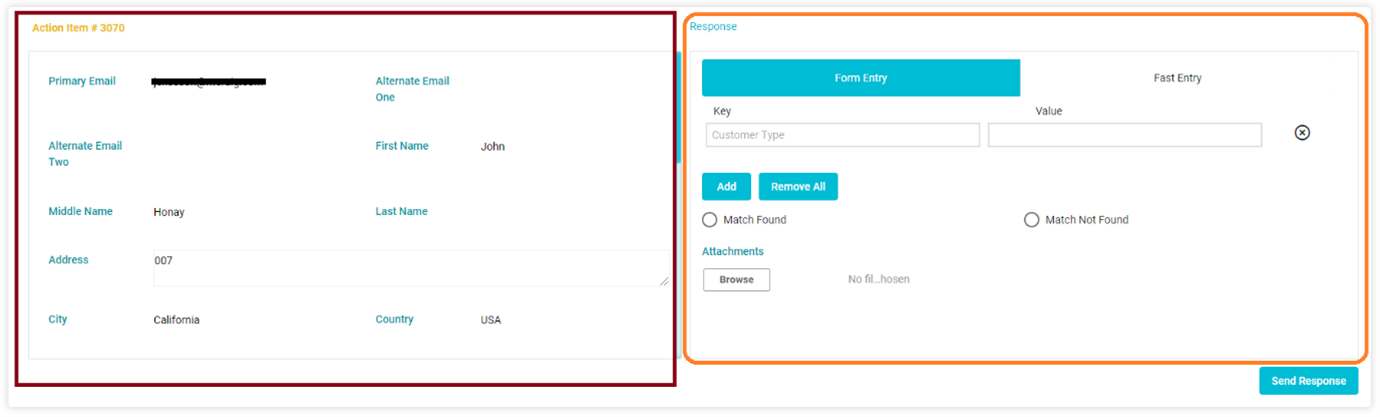
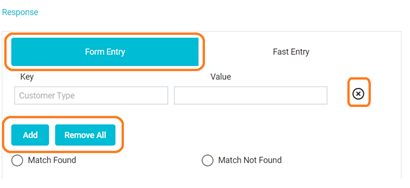
The Response can be provided in two ways, either using Form Entry or Fast Entry
Form Entry: This is done when the admin has pre-created the Keys needed for the Action Item. You will need to input the required details in the Value field
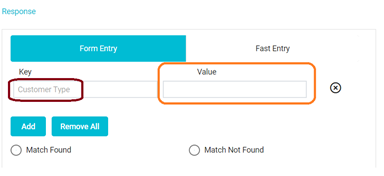
E.g., Customer Type or Client ID - information pertaining to the requestors that enable users to identify the requestors' details from the company database
- You can add more Keys by clicking
 It can also be used if you have received additional details about the requestor from the company database. To remove the Key, click on the
  or the
  button.
- You can add more Keys by clicking
Fast Entry: The Fast Entry option allows you to manually enter in the requestor's information in the box provided while cross checking for the said information against the company database.
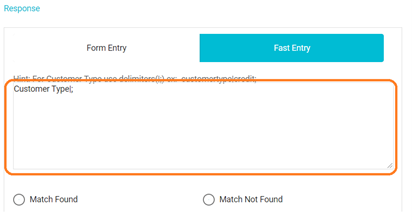
If you are unable to identify any details from the company database with the information provided by the requestor, check the Match Not Found option and click Send Response
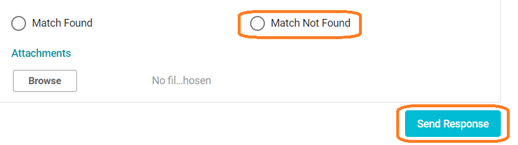
In case you are able to identify the details from the company database with the information provided by the requestor, you must provide the Key Values and any other additional information in their respective fields. Then check the Match Found option.
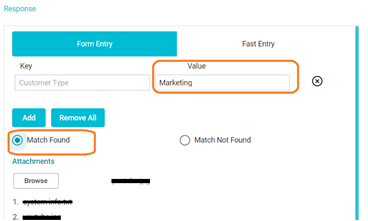
You can also add attachments to your Response that would be useful in processing the request (optional)

After filling in all the information, click
 .
.Note: The values entered in the fields along with the selection made (Match Found or Match Not Found) will be auto-saved before sending the response. Clicking on Send Response will complete the Action Item.
Process Request
Once the request is in the In Process Request state, you will receive an email with a link for the Action Item assigned to you.
Clicking on the link will take you to the Data Governance Tool login page
Once logged in, you will see the Action Items that have been assigned to you
Alternatively, you can access all the Action Items assigned to you at the My Action Items section located at the bottom of the Home Page.
Select Process

Note: Here, the Action Items are color-coded based on their status. Red indicates that an Action Item is in the “Created” state. Yellow indicates that the email has been sent to the Data Steward or the Point of Contact. Green indicates that the response has been submitted for the Action Item.
The Action Item page will show all the Requestors' and Request details
On scrolling down, you will see the Action Item assigned to you
Based on the request type, you will need to process the Action Item.
How to process the action item?
Once the requested action is completed from your end, you can add the comments in the Response field

For the Request types Summarized Categories of Information and Copy of Information, you will need to create a pre-formatted report
Once the Report has been created, you can attach the document in the Attachments field
After filling in all the information, click
. 
Note: The values entered in the fields along with the selection made (Match Found or Match Not Found) will be auto-saved before sending the response. Clicking on Send Response will complete the Action Item.